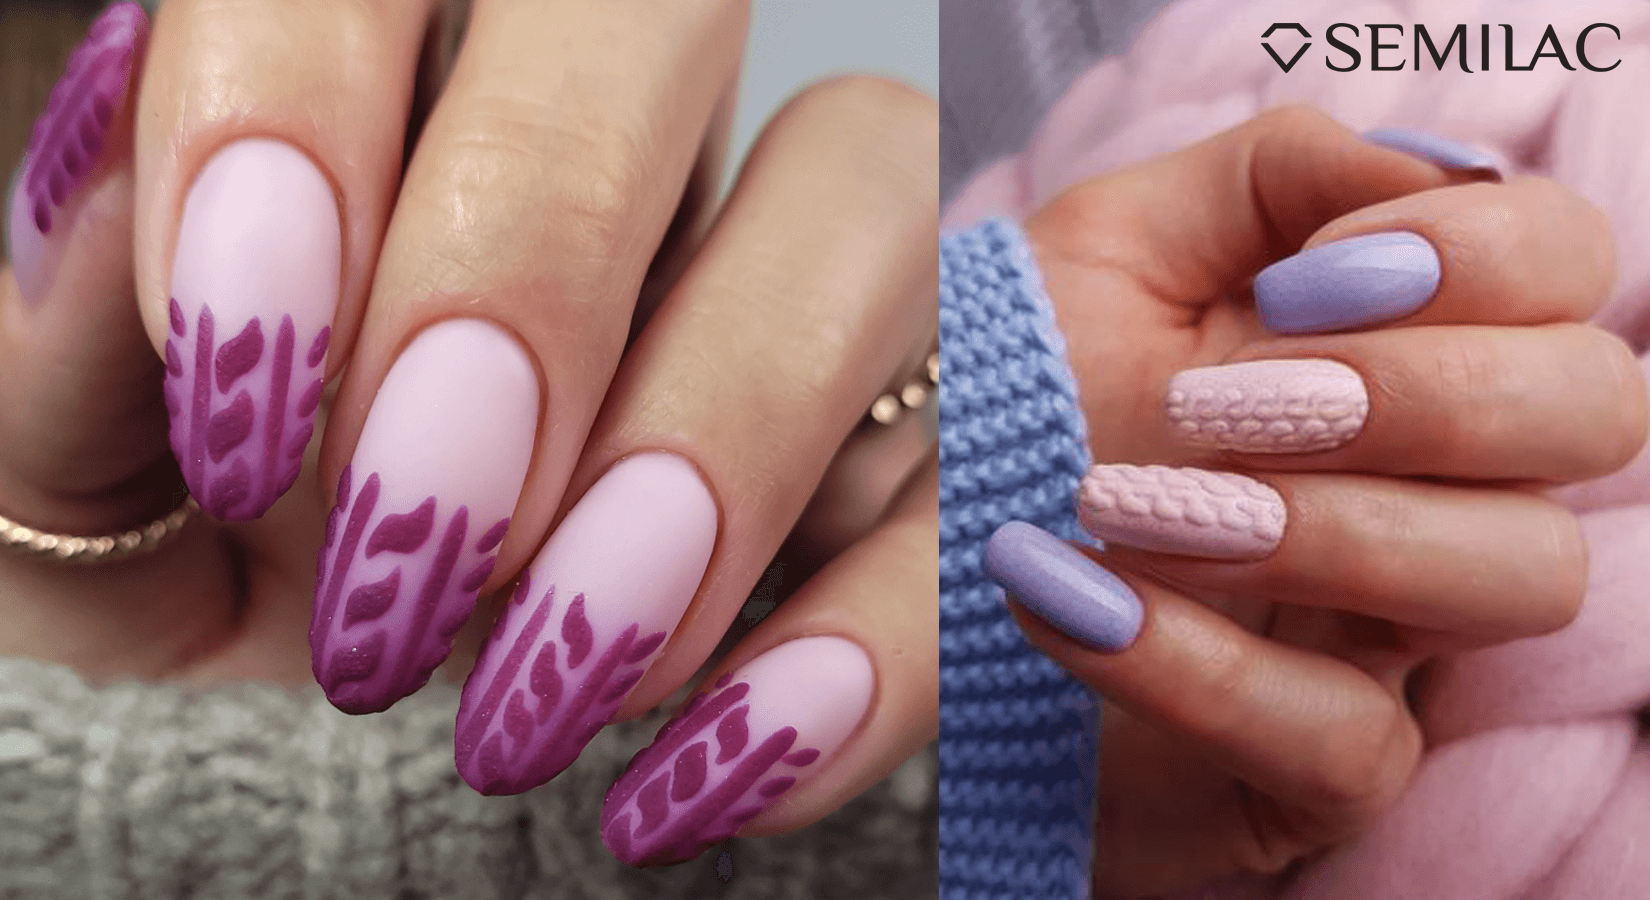
It’s time to welcome autumn and make the most of its charm! This cosy and magical season allows us to slow down and enjoy the stunning landscapes. But you don't need to check the calendar to know when autumn has arrived - your nails will let you know! Cosy nail designs, especially the trendy sweater nails, are the perfect way to embrace the season. In this guide, we’ll show you how to create this stylish nail art, the products you’ll need, and where to find inspiration.
What Are Sweater Nails?
If you’re new to the world of manicures, now is the ideal time to discover sweater nails. This chic nail art is a raised, 3D design that mimics the texture and pattern of a knitted sweater, giving your nails a cosy, autumnal feel. The trend has become a seasonal staple, returning year after year in the colder months, and it shows no sign of going away anytime soon. While the effect may look intricate, creating sweater nails is easier than you might think. Follow our tips and inspiration to embrace autumn in style!

Sweater Nails Step by Step - Essential Tools and Products
The key to creating beautiful sweater nails lies in preparation. Using high-quality products and tools will make the process much easier and more enjoyable. So, what do you need to achieve this look, and what are the essential tips?
-
Be Careful with the Top Coat!
One of the most important things to remember is not to apply a top coat over your raised sweater design. If you do, the design will blur and lose its textured effect. The sweater pattern should be created on a fully finished nail after the top coat has been applied. -
Short-bristled Brush
While experienced nail artists may be able to create a sweater pattern with just a toothpick, why make things harder than they need to be? There are plenty of professional tools available to make the process easier. Make sure to get a thin, short-bristled nail art brush, like the Semilac Multitool 2in1. This will help you create fine, detailed, raised patterns with ease. You can also use a dotting tool for perfect dots. -
Long-bristled Brush
Many sweater designs feature long, straight lines. If you’re drawn to a pattern like this, you’ll want a long-bristled brush, such as the NO2 Perfect Line. This will allow you to create precise lines and even complex patterns effortlessly. -
Adding Texture
While applying a top coat over the sweater design is not recommended, you can enhance the texture in other ways. Before curing the design, sprinkle acrylic powder or a glitter pigment over it for added sparkle and texture. A product like Semilac Flash Mermaid powder in shade 683, with its intriguing orange-gold shimmer, can add a unique, eye-catching finish. -
Creativity and High-Quality Products: A Perfect Combo!
As mentioned earlier, using high-quality tools and products is key to success. But don’t be afraid to get creative and experiment with different combinations to create a truly unique look. The more you practise and explore different designs, the more confident and skilled you’ll become.

Step-by-Step Sweater Nails - Tried and Tested Methods
Here’s a step-by-step guide to creating sweater nails quickly and accurately. Follow this process, and we guarantee you’ll fall in love with this cosy design. You might even look forward to the autumn-winter season just so you can try it out again!
Sweater Nails with UV Gel Polish and Acrylic Powder
Before you begin, make sure you have all the necessary products and tools. Set aside enough time so you can enjoy the process without feeling rushed.
1. Nail Preparation
Shape your nails and gently push back your cuticles. Buff the nail surface and clean it with a nail cleaner to remove any oils and dirt.
2. Apply the Base Coat
A good base coat is essential for a long-lasting manicure. It protects your nails and ensures the polish doesn’t chip or crack. Apply the base coat and cure it under the lamp.
3. Apply the UV Gel Polish
Apply two thin layers of your chosen Semilac UV gel polish. Be careful not to get any polish on your skin. Cure each layer under the UV/LED lamp.
4. Apply the Top Coat
Finish the nails with a top coat and cure it under the lamp. You can choose a matte or glossy finish - try both and see which you prefer!
5. Prepare the Mixture
To create the raised sweater effect, mix a small amount of UV gel polish with acrylic powder. A 1:1 ratio works best, but if you’re just starting or prefer a thicker texture, add a bit more powder.
6. Creating the Sweater Design
For more intricate sweater patterns, it’s best to work in sections. Apply part of the design, then cure it under the lamp before continuing. This prevents the design from smudging or merging if the gel polish moves before curing.
Sweater Nails with Acrylic Powder for Extra Texture
After following the same steps as above, you can add more texture by sprinkling acrylic powder over the uncured sweater design. Use a product like Semilac Acrylic Powder Clear for a rough, knitted texture that closely resembles real fabric.

Sweater Nails - Inspiration
Feel free to create your own unique patterns, or find inspiration from others. For a classy, neutral look, try using Semilac UV gel polish 563 Heartwarming. This frosty white shade with a hint of silver shimmer is perfect for a chic sweater manicure on both short and long nails.
If you prefer something warmer, Semilac UV gel polish 562 Warm Evening combines beige and dusky pink with a touch of red sparkle - ideal for brightening up gloomy autumn days. For a bold, adventurous look, deep reds, bottle greens, browns, and oranges work wonderfully for autumn. You could even use a different colour on each nail for a trendy, statement look. Don’t be afraid to experiment and have fun with your designs! Let your imagination run wild and express your style with this fun and cosy trend. With a bit of practice, you’ll be able to create stunning sweater nails that’ll make you excited for the colder months ahead!


