In the realm of nail care and nail enhancements, the C-curve is a crucial element that significantly influences the appearance and durability of both natural and artificial nails. For those seeking to perfect their nail game, understanding the C-curve and knowing how to create it with Semilac products can elevate your manicure or pedicure to a professional level. Here’s an in-depth look at what the C-curve is, its importance, and how to build it effectively.
What Is the C-Curve?
The C-curve refers to the natural curvature of the nail plate, which resembles the letter "C" when viewed from the side. This curve adds strength and elegance to the nails, creating a more aesthetically pleasing shape and improving the overall structure. The C-curve is particularly important for those with acrylic or UV gel nails, as it enhances the durability and balance of the nail enhancement.
Why Is the C-Curve Important?
-
Strength and Durability: The C-curve contributes to the strength of the nail, making it more resilient to everyday wear and tear. This is particularly important for artificial nails, which need extra support to avoid breaking or lifting.
-
Aesthetic Appeal: A well-defined C-curve gives nails a more elegant and elongated appearance. It can make nails look more professionally done and is often a hallmark of high-quality nail work.
-
Structural Balance: For acrylic and UV gel nails, the C-curve helps distribute pressure evenly across the nail, reducing the likelihood of stress points that could lead to cracking or breaking.

How to Build the Perfect C-Curve with Semilac Products
Achieving the ideal C-curve involves careful shaping and application techniques. Here’s a step-by-step guide using Semilac products to create a stunning C-curve:
Step 1: Prepare Your Nails
Before you begin, ensure your nails are clean and dry. Remove any old polish and shape your natural nails if needed. Use a Semilac Nail File to shape your nails, paying attention to the natural curve and ensuring a smooth surface.
Step 2: Apply a Base Coat
For artificial nails, start with a Semilac Base Coat. This provides a foundation for better adhesion of acrylic or UV gel products. Apply a thin layer to your nails and cure under a UV/LED lamp as per the product’s instructions.
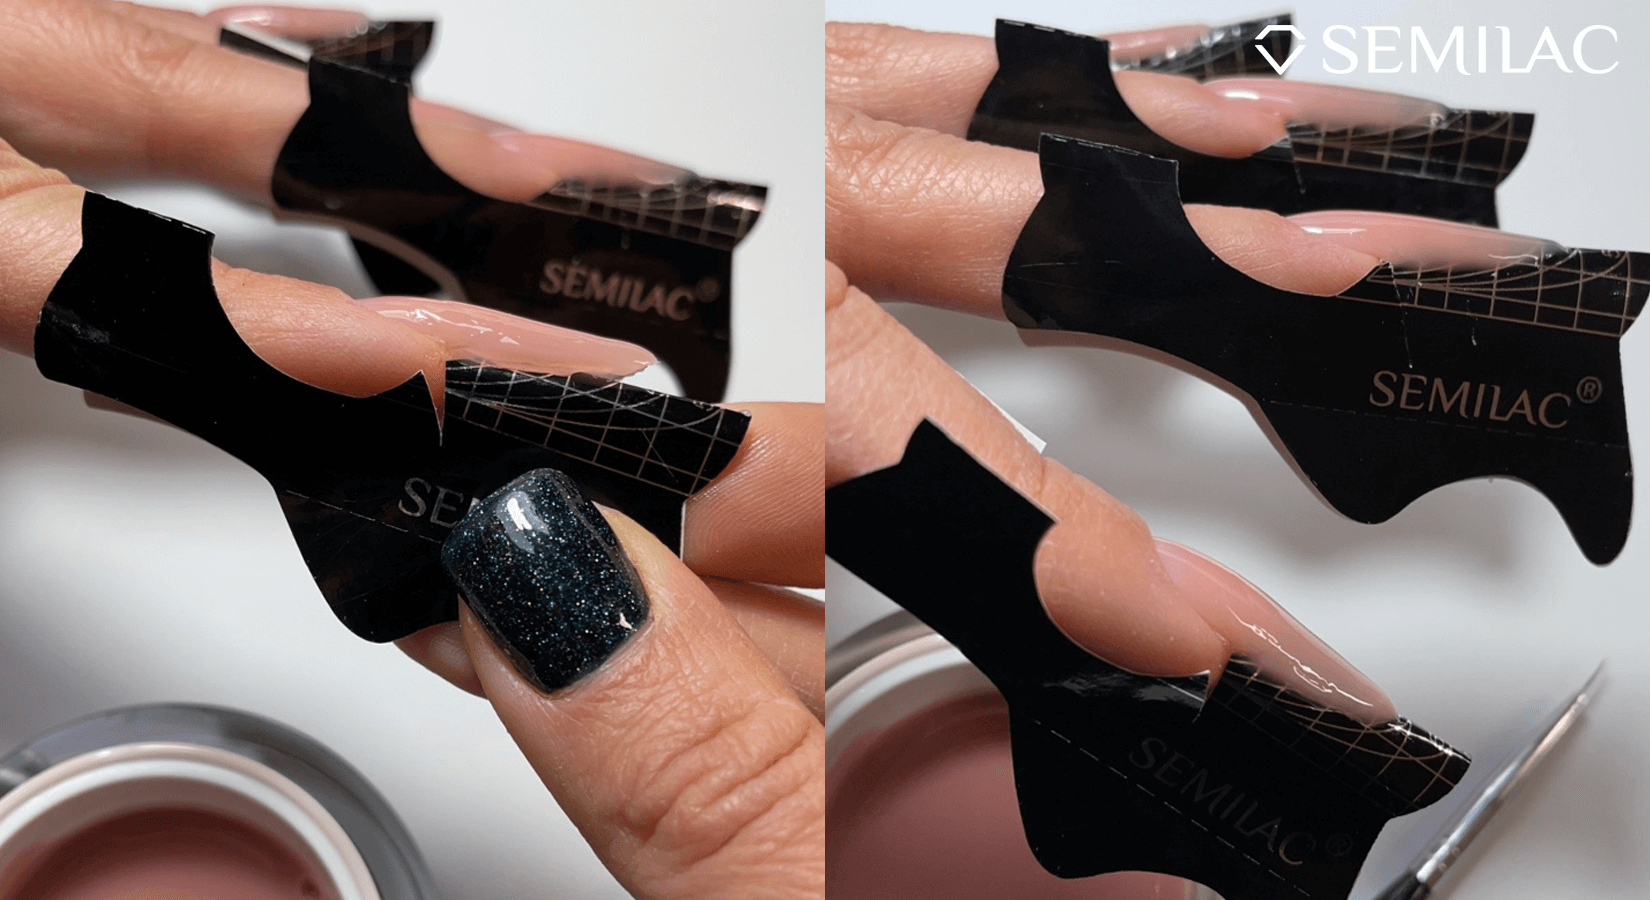
Step 3: Form the C-Curve
-
Acrylic Nails:
- Apply a form or a nail tip to your natural nail. If using forms, ensure they fit snugly and align with the natural curvature of your nail.
- Using Semilac Acrylic Powder and Liquid, sculpt the acrylic to build the C-curve. Focus on the centre of the nail to create the desired curve.
- Once the acrylic is applied, use a brush to refine the shape, ensuring a smooth and balanced C-curve.
- Cure the acrylic as directed.
-
Gel Nails:
- Apply a Semilac UV Gel Primer to the nail surface to improve adhesion.
- Apply a Semilac Build UV Gel or a sculpting gel to form the C-curve. Use a brush or a spatula to shape the UV gel, focusing on achieving the curve you want.
- Cure under a UV/LED lamp, following the specific curing time recommended for the UV gel you’re using.
Step 4: Refine and Shape
After curing, use a Semilac Nail File to refine the shape of the C-curve. Gently file the sides and edges to ensure a smooth, even curve. Be careful not to over-file and disrupt the C-curve you’ve created.
Step 5: Apply a Top Coat
Finish with a Semilac Top Coat to seal in your design and add a glossy finish. Cure under the UV/LED lamp as per the product instructions. After curing, clean any sticky residue with Semilac Nail Cleaner.
Step 6: Maintain the C-Curve
Regular maintenance is key to keeping the C-curve in top condition. Touch up as needed and be mindful of any wear or chipping that may affect the curve. Using Semilac Cuticle Oil can also help keep your cuticles healthy and your nails looking their best.

Tips for Achieving and Maintaining the C-Curve
-
Practice Precision: Building the C-curve requires precision and a steady hand. Take your time to sculpt and refine the curve to achieve the best results.
-
Use Quality Products: Semilac’s high-quality products are designed to make the process easier and more effective. Using the right products ensures better adhesion, durability, and finish.
-
Seek Professional Advice: If you’re new to creating the C-curve, consider seeking advice from a professional nail technician or taking a nail enhancement course to perfect your technique.
Conclusion
The C-curve is a vital component of nail aesthetics and durability, especially when working with acrylic or UV gel nails. By understanding its importance and following the steps to build it with Semilac products, you can achieve beautifully sculpted nails that are both strong and stylish. Whether you’re a nail enthusiast or a professional technician, mastering the C-curve will elevate your nail care routine and ensure stunning results.