SEMILAC PRO — TECHNIQUE
In this guide: diagnosing lifting by location (cuticle vs free edge vs full-plate), the four root causes of yellowing (heat, light, formulation, plate staining), the prep changes that prevent both, and a quick reference decision tree to use chairside.
Lifting and yellowing are the two complaints that bring clients back to the salon between appointments more than any other. Both are nearly always preventable. Both are commonly misdiagnosed — the symptom looks the same across very different root causes, and the wrong fix wastes product, time, and the client's confidence in your work.
This guide breaks both down by where the failure shows up, what's actually causing it, and the specific prep or product change that resolves it on the salon floor.

Lifting: diagnose by location, not by client
Where the gel lifts tells you what went wrong. Three patterns, three different fixes. Don't conflate them — the cuticle-area fix won't help a free-edge problem and vice versa.
Pattern 1: Lifting from the cuticle area
What you're seeing: The seal at the proximal wall breaks within 5–7 days. The lift is small at first, opens up rapidly. Often one or two specific fingers, not all ten.
Root causes (in order of frequency):
- Cuticle residue on the plate. Pterygium (the membrane that sticks to the natural plate) wasn't fully removed during prep. Gel bonds to the membrane, the membrane lifts off the plate.
- Base flooding the cuticle wall. Product touching the skin instead of stopping cleanly at the plate edge. Skin movement pulls the entire seal.
- Hand-cream or oil contamination on the proximal wall from the client's pre-appointment routine.
The fix: Tighten cuticle prep. Use a wooden stick or a soft rubber e-file bit at low speed to push back and clear pterygium thoroughly. Keep a 0.5–1mm margin between the cuticle wall and your base coat — if you can't reliably hit that gap, your brush is too loaded. Wipe off excess on the bottle neck before each nail. Degrease the proximal wall with Semilac Nail Cleaner on a fresh lint-free pad before primer.
Pattern 2: Lifting from the free edge
What you're seeing: Gel cracks or peels back from the tip of the nail within 3–5 days. Often coincides with clients who type all day, lift weights, or work with their hands.
Root causes:
- Free edge not capped at every layer. If only the top coat caps the edge, water and movement creep in from underneath.
- Rigid base on a flexible plate. Hard cure doesn't move with the natural plate; bond breaks at the most-stressed point (the free edge).
- Free edge not properly degreased — common when the technician runs the cleaner pad along the top surface and skips the underside of the tip.
The fix: Cap base, colour, and top coat at every layer — run the brush vertically along the very tip of the nail. For clients with thin or flexible plates, switch to a rubber base — Semilac BB Base Nude or BB Base Rose — both are caoutchouc formulas with density 4/5 that flex with the plate.
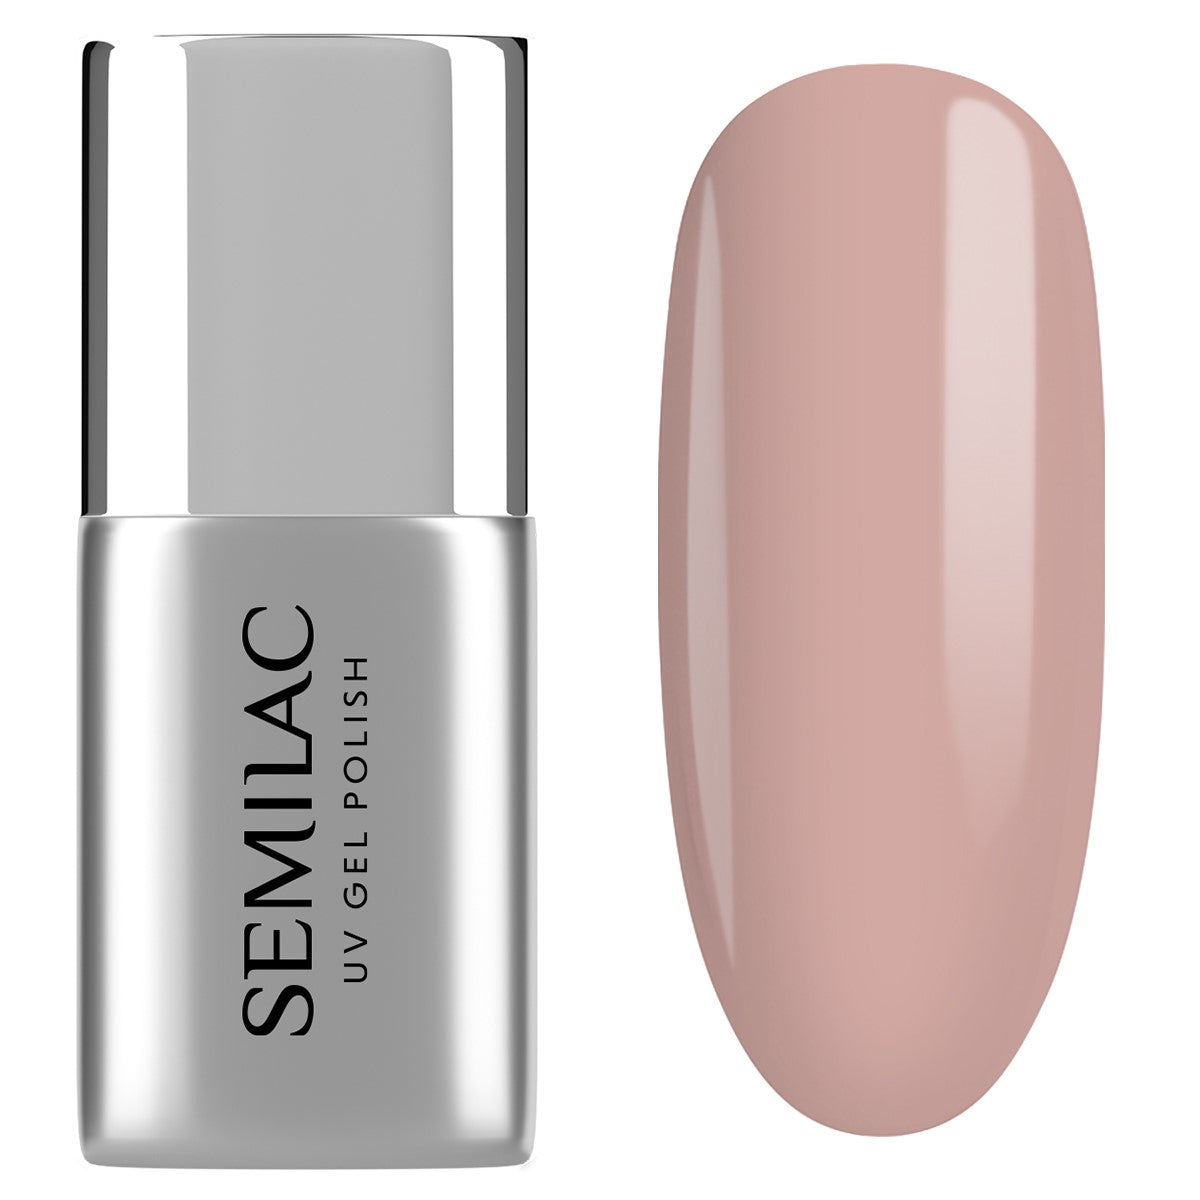
BB Base Nude
Rubber base · density 4/5 · flexible cure
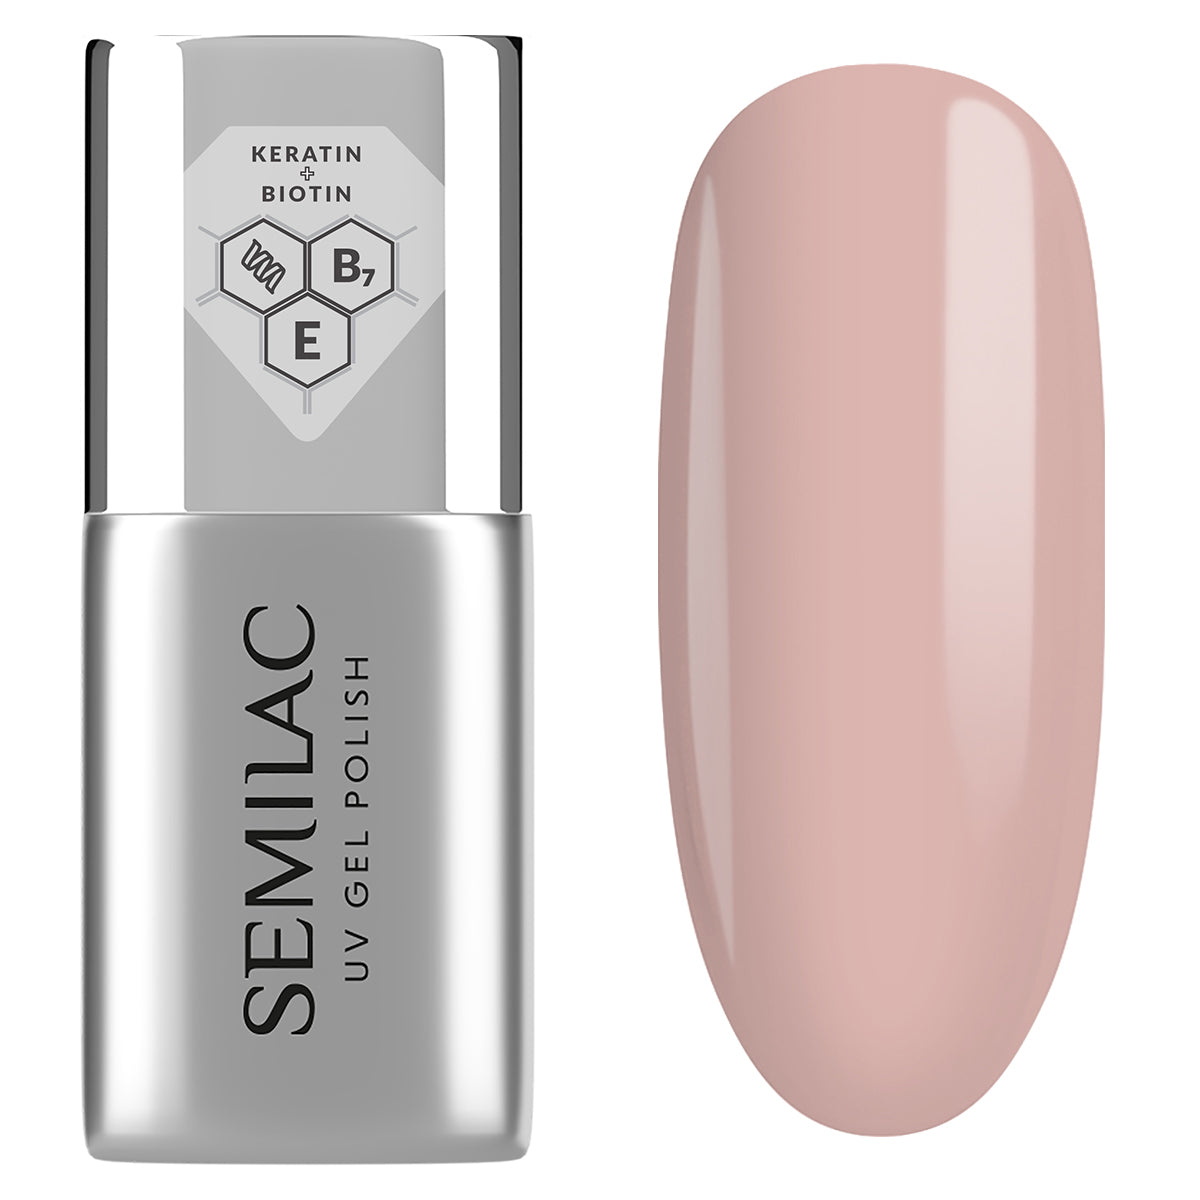
Care Base
Biotin · keratin · nylon fibres for brittle plates
Pattern 3: Full-plate peeling in one sheet
What you're seeing: The entire colour-and-base lifts off as a single layer, often days after the appointment, sometimes when the client knocks it.
Root cause: The bond between the gel and the natural plate failed wholesale. Almost always either (a) primer was skipped, applied too late, or applied while still flooded onto the cuticle (so it didn't fully evaporate), or (b) the matting pass on the natural plate was skipped — the gel bonded to itself rather than to the matte surface.
The fix: Both prep steps are non-negotiable. Light buffing pass with a 180/240 buffer block, no pressure, one pass — surface should look uniformly matte. Apply acid-free primer to the natural plate only, full evaporation (~30 seconds, surface should look matte), then base.
When a client reports lifting, look at the two index fingers compared with the two ring fingers. If lifting is concentrated on dominant-hand index fingers, it's a wear/use pattern (caps and rubber base needed). If lifting is uniform across all ten, it's a process pattern (prep, primer or contamination). Different problem, different fix.
Yellowing: four root causes, four different fixes
Yellowing has more variance than lifting and is more often misattributed. The four root causes:
Cause 1: Heat transfer during cure
What you're seeing: Yellow tint visible across the cured gel surface, especially under sheer pastel or white shades. Worse on clients who report a "burn" sensation during cure.
Root cause: Heat from over-thick application + high-wattage lamp. The exotherm reaches a level that yellows the photoinitiator residue.
The fix: Two thin layers of base, not one thick layer. Cure each fully. For sensitive clients use the lamp's low-heat or "flash" mode. If you don't have flash mode, use a 12W spot lamp on the base layer first, then move to the full lamp for colour.
Cause 2: UV exposure of the cured surface
What you're seeing: Yellowing develops over 1–2 weeks of wear, more pronounced on sun-exposed fingers (index, middle), barely present on ring or pinky.
Root cause: Older top coat formulations yellow under sustained UV. Most newer no-wipe top coats are stabilised against this; older or budget top coats are not.
The fix: Switch to a stabilised no-wipe top coat — the Professional Top Coat No Wipe 700 True Tone is specifically formulated to stay clear under prolonged UV. Brief clients on SPF for the back of the hands during long beach holidays.
Cause 3: Plate staining from pigment
What you're seeing: Yellow tint on the natural plate after gel removal. Not a problem with the gel itself.
Root cause: Pigmented colour applied directly to the natural plate without a clear base coat layer. Most common with reds, blues, and yellows. The pigment migrates into the keratin.
The fix: Always apply a clear base before pigmented colour. For removal, after soaking off, a single application of a hydrating Care Base with biotin and keratin under a treatment break helps the plate recover.
Cause 4: Smoking, frequent sun, or chemical exposure
What you're seeing: Yellowing concentrated on the natural plate visible through clear or pale gel. Develops over weeks, often persistent across multiple appointments.
Root cause: Lifestyle factors. Tar, prolonged UV, cleaning chemicals, hair dye exposure. The gel is innocent.
The fix: Cover bases. BB Base Rose hides the discolouration without needing a separate cover layer. For clients who want this discreetly addressed, the cover base + sheer pastel combination is a more elegant solution than a frank conversation about tar staining.
Process changes that prevent both
If you want to reduce both complaints across your column without changing your product line, the highest-leverage process changes are:
- Two thin layers of base, not one thick layer. Reduces exotherm yellowing and improves bond at the same time.
- Always-cap protocol. Cap base, colour and top — vertically along the free edge — every time, no exceptions.
- Fresh lint-free pad per nail for degreasing. Reusing pads carries oil and dispersion to subsequent nails.
- Wait 30 seconds for primer evaporation before applying base. Set a small timer if needed — most lifting at the cuticle traces back to primer that didn't fully flash.
- Stabilised top coat as default. The cost difference is marginal; the yellowing reduction is significant.
Quick reference: chairside decision tree
| Symptom | Most likely cause | First fix to try |
|---|---|---|
| Lift from cuticle area, days 5–7 | Pterygium / cuticle prep | Tighten cuticle prep + 0.5mm margin |
| Lift from free edge, days 3–5 | Not capping / rigid base on flexible plate | Cap all 3 layers + switch to BB Base |
| Full-plate sheet peeling | Primer skipped / matting skipped | Reinstall both prep steps |
| Yellow tint at cure | Heat / thick base layer | Two thin base layers, cure each fully |
| Yellowing 1–2 weeks in | UV-degraded top coat | Switch to stabilised no-wipe top |
| Yellow plate after removal | Pigment migration | Clear base under all pigmented colours |
| Persistent yellow plate | Lifestyle (smoking/sun/chemicals) | Cover base (BB Rose) + cosmetic conversation |
Frequently asked questions
Can the same client lift in different patterns?
Yes — and often does. A client with thin nails who also rushed prep can lift from the free edge AND the cuticle. Diagnose each finger independently and treat the dominant pattern.
How do I tell heat-yellowing from UV-yellowing?
Timing. Heat-yellowing is visible at the end of the appointment. UV-yellowing develops over a week or two of wear. If the client says "it was already yellow when I left", it's heat. If they say "it yellowed on holiday", it's UV.
Does a more expensive top coat actually reduce yellowing?
Stabilised UV-resistant top coats reduce it significantly compared to budget formulations. The Semilac Professional No Wipe 700 True Tone is the formulation we'd specify for clients who notice yellowing across their wear cycle.
What's the right primer protocol for damaged plates?
Acid-free primer, applied to natural plate only, full evaporation (matte appearance) before base. Never apply on cuticle skin. For sensitive plates, use the Semilac Vitamin Primer — same acid-free profile with vitamin E.
Should I rebuild thin nails before applying gel?
If lifting is chronic and the plate is structurally compromised, yes — apply Semilac Smart Builder 816 Pale Nude as a self-levelling reinforcement layer before colour. The 5-in-1 formula functions as base + builder + structural support in one step.
Products referenced in this guide:
- Semilac BB Base Nude 7ml — flexible rubber base
- Semilac BB Base Rose 7ml — same formula with cover-base tint
- Semilac Care Base 7ml — biotin + keratin + nylon fibres
- Semilac Smart Builder 816 Pale Nude — self-levelling 5-in-1
- Semilac Acid-Free Primer 7ml
- Semilac Vitamin Primer 7ml
- Semilac Nail Cleaner 125ml
- Semilac Lint-Free Pads 200pc
- Professional Top Coat No Wipe 700 True Tone 11ml
Trade pricing: 20% professional discount on the entire Semilac UK range. Free UK delivery on orders over £25. Join the Semilac Professional Network if you're not already registered.
Related reading: